Upcycled Antique Thrift Store Radio Table
As an Amazon Associate and member of other affiliate programs, I earn from qualifying purchases.
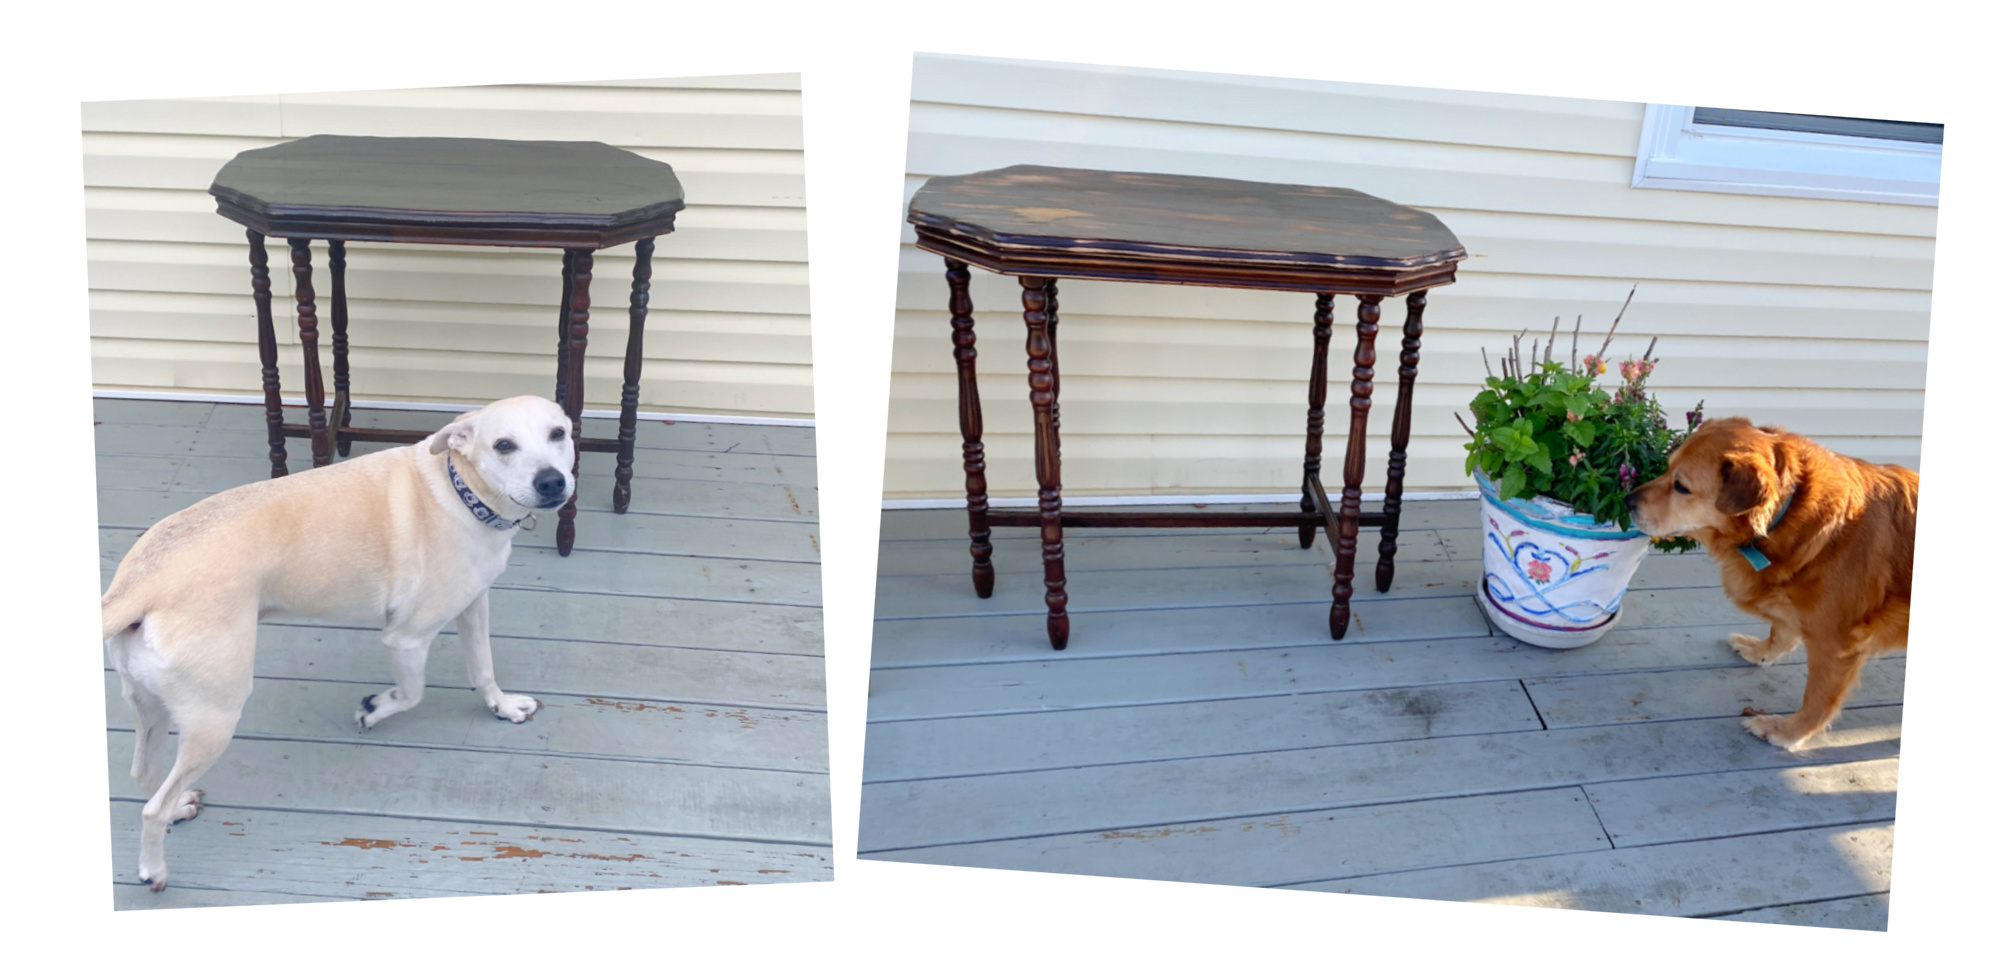
I’ve had this old gal for sometime. Actually, I have several like her. But she caught my eye in the corner of the garage. As I needed a project piece for this month’s Thrift Store Decor Team post, I figured why not!! Let’s update this antique radio table the I grabbed from the thrift store.
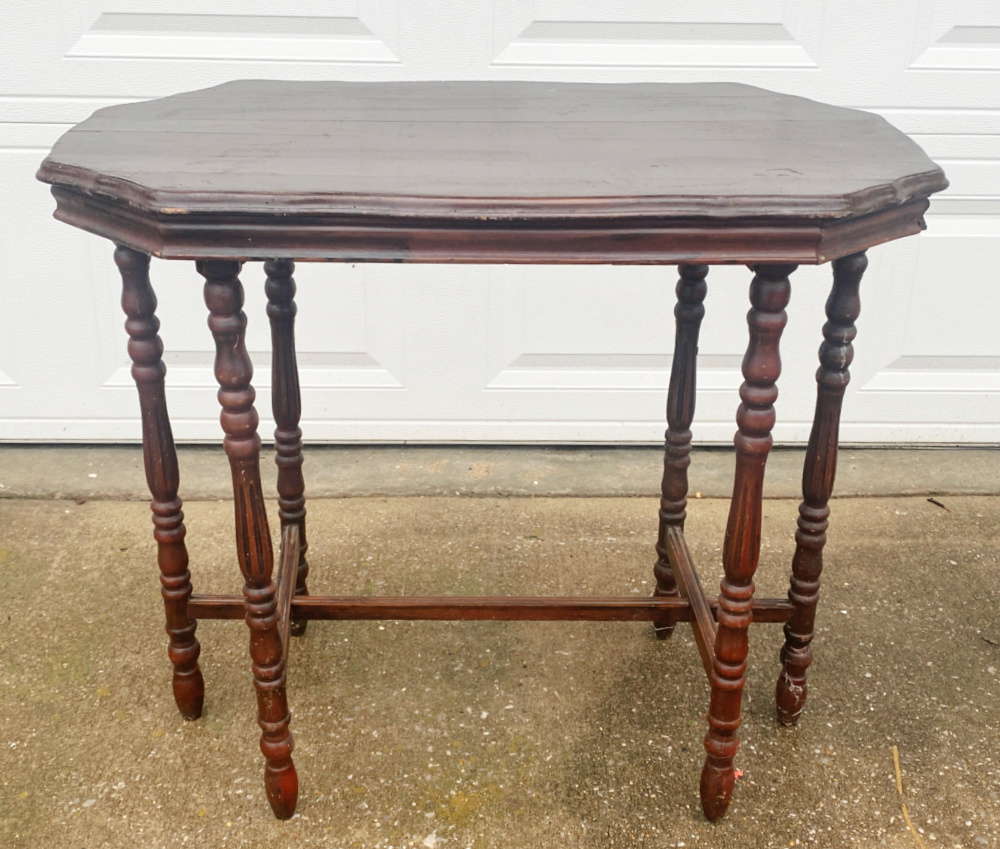
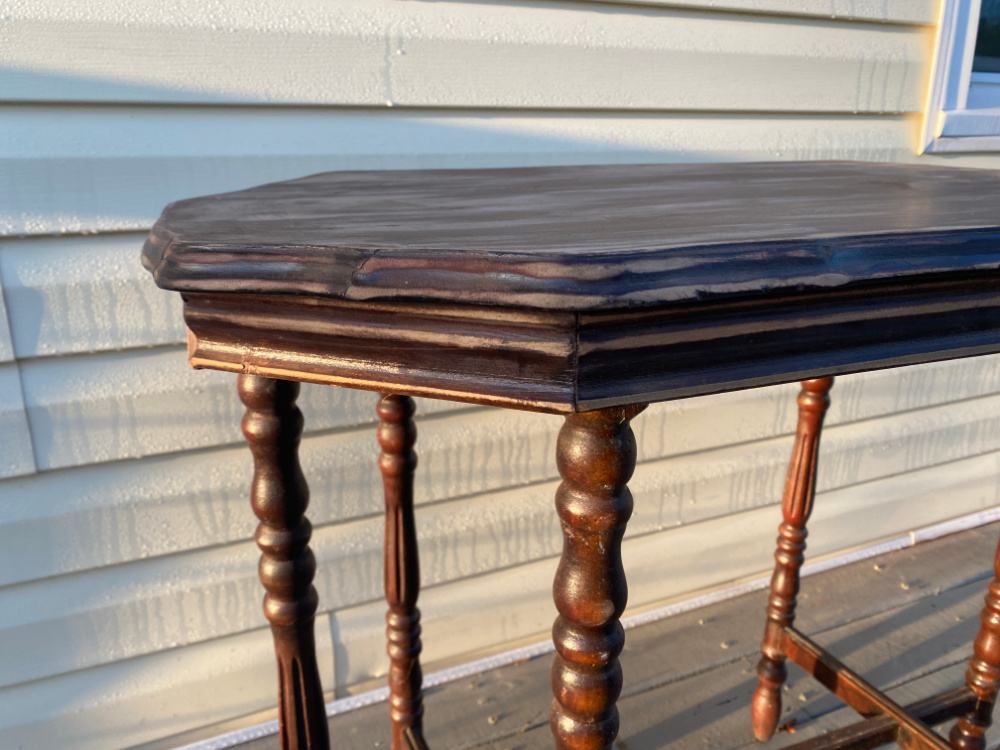
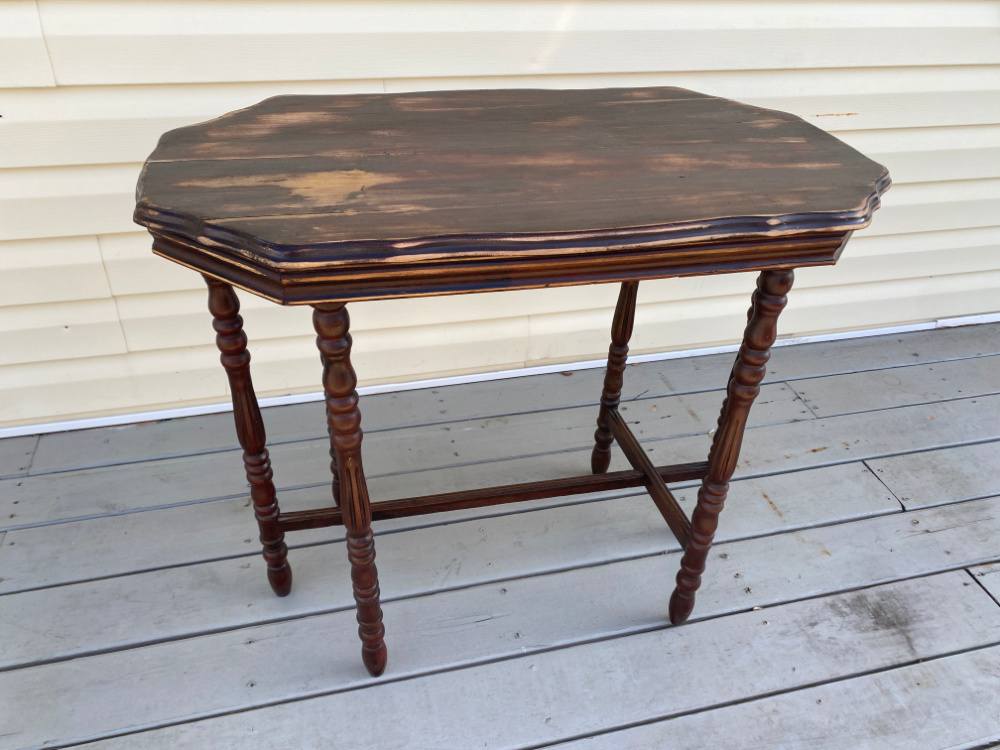
Just look at those legs!
They make me so happy!
And my favorite finish to paint over is a dark wood, like this gal with the walnut stained top. My plan is to make her bright and cheery and, of course, distressed.
A furniture makeover? That means, yes! It must be the second Wednesday of the month and time for the Thrift Store Decor Team projects! All of this month’s projects are linked at the end of this post for your DIYing, upcycling, repurposing, and thrift seeking pleasure!
Gameplan
She was pretty cruddy. So I decided to bring her up onto the deck to clean and prep her for her makeover. Rain was on the way so I would be able to bring her into the house quickly should the skies open up.
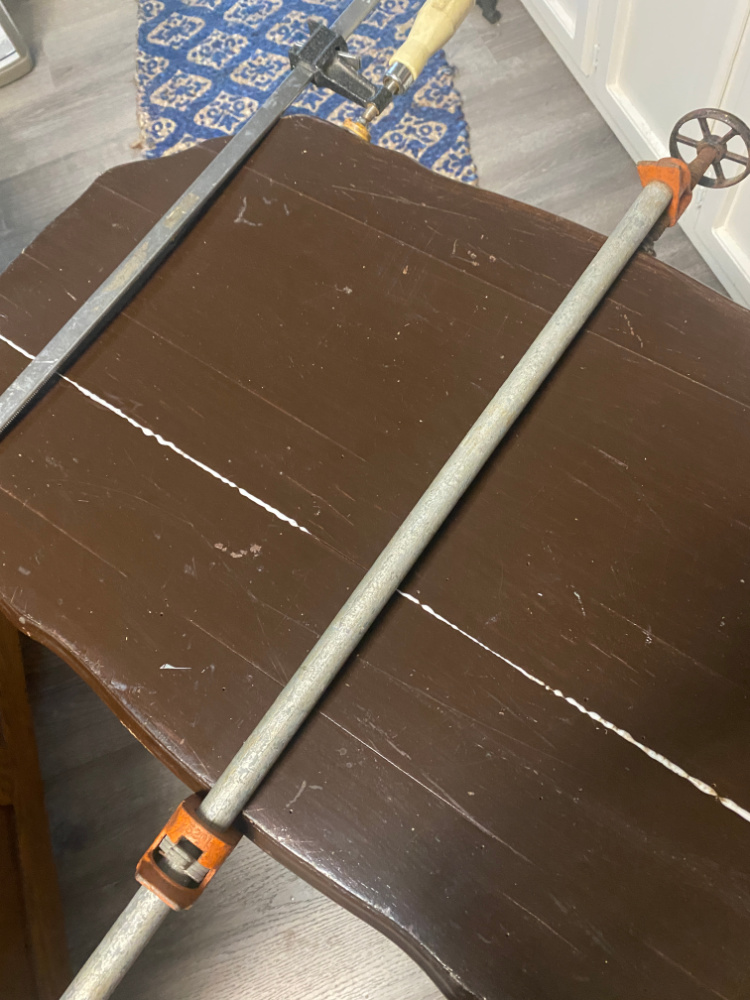
Of course, since this is one of my projects, it got a little more complicated right from the start. While carrying her up the stairs and opening the deck gate, her top separated.
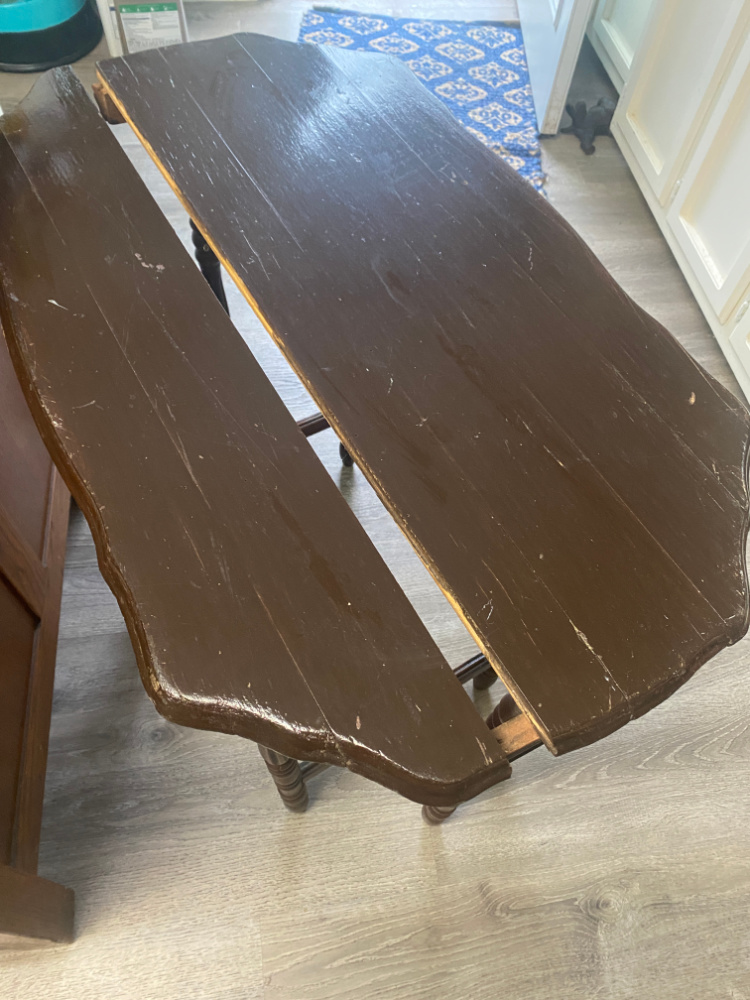
You are in luck to day friends, because you will get a second tutorial on how to repair a split tabletop!
Repairing a Split Tabletop
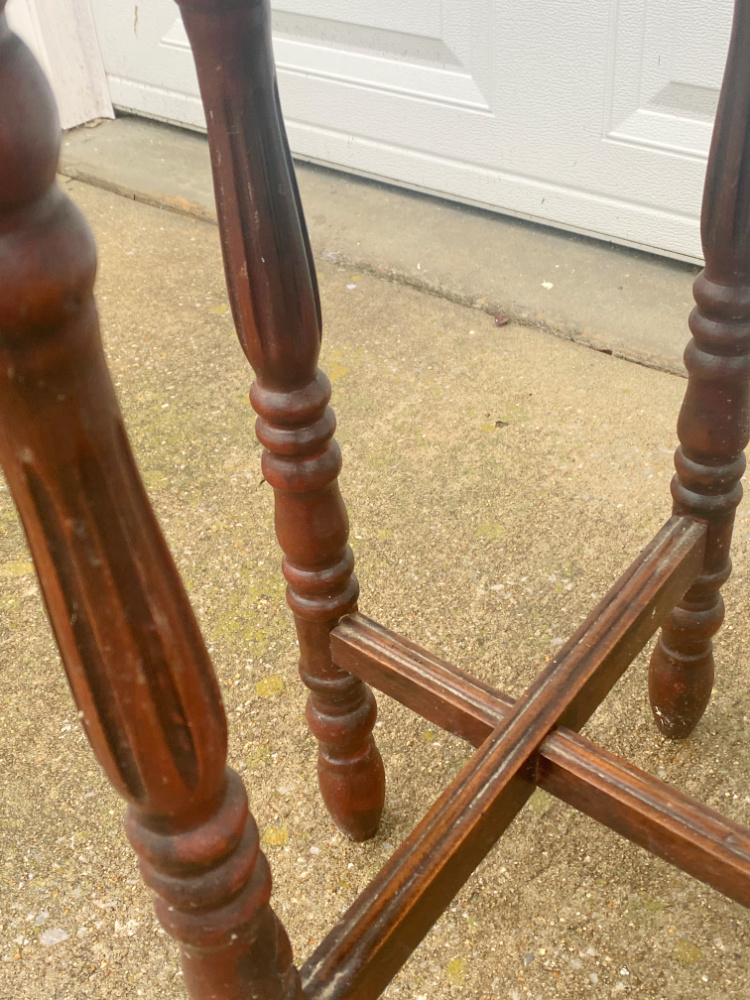
This is actually quite an easy repair. Just grab some wood glue and a clamp or two to start.
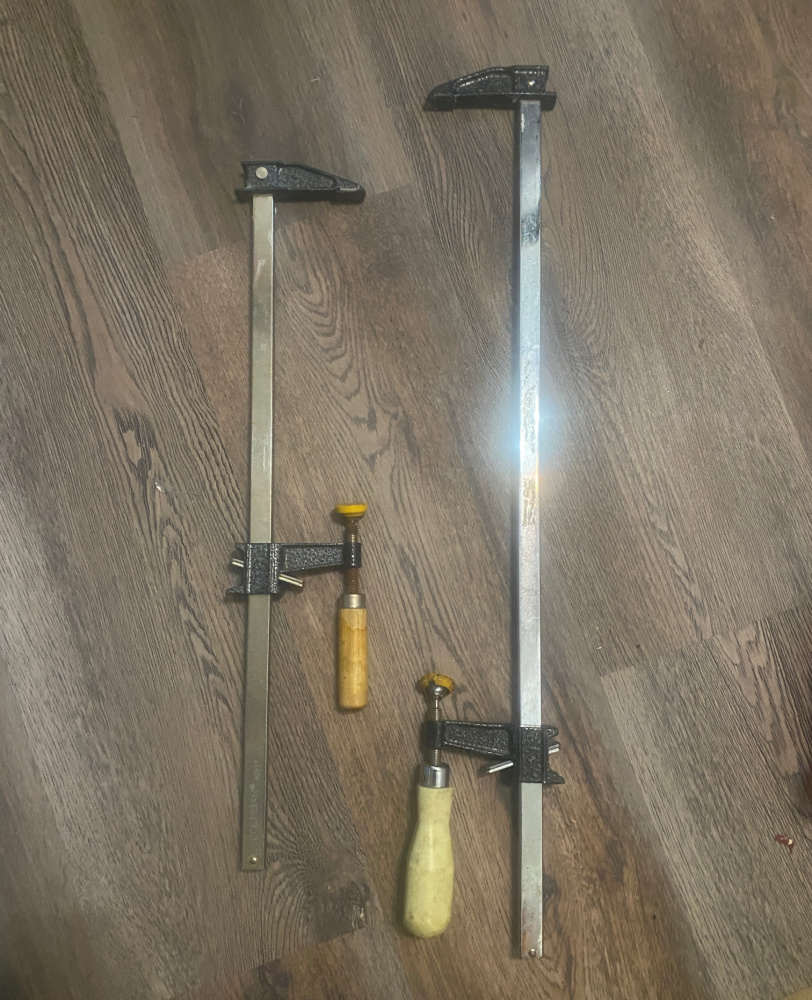
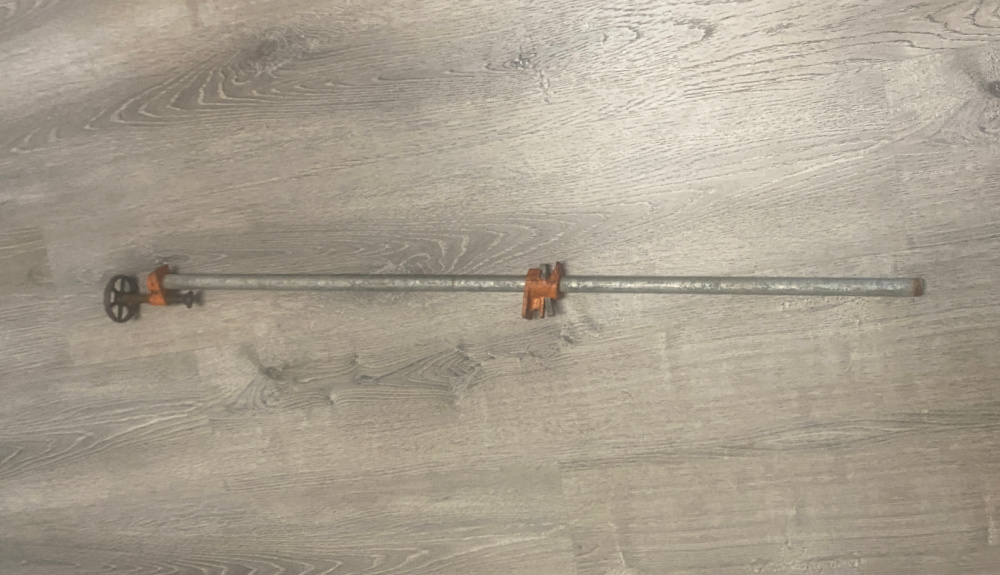
Sounds simple, right? Until only one clamp is long enough the clamp the tabletop. I remembered I had one of my dad’s old clamps in the garage. I had never used it before so I grabbed it an it worked perfectly. Pop was a woodworker, refinisher, the ultimate DIYer, He could fix anything and I cannot every remember a repairman coming to our house to fix anything. Pop did it all!

Place a liberal bead of glue along the complete length of the broken edge.
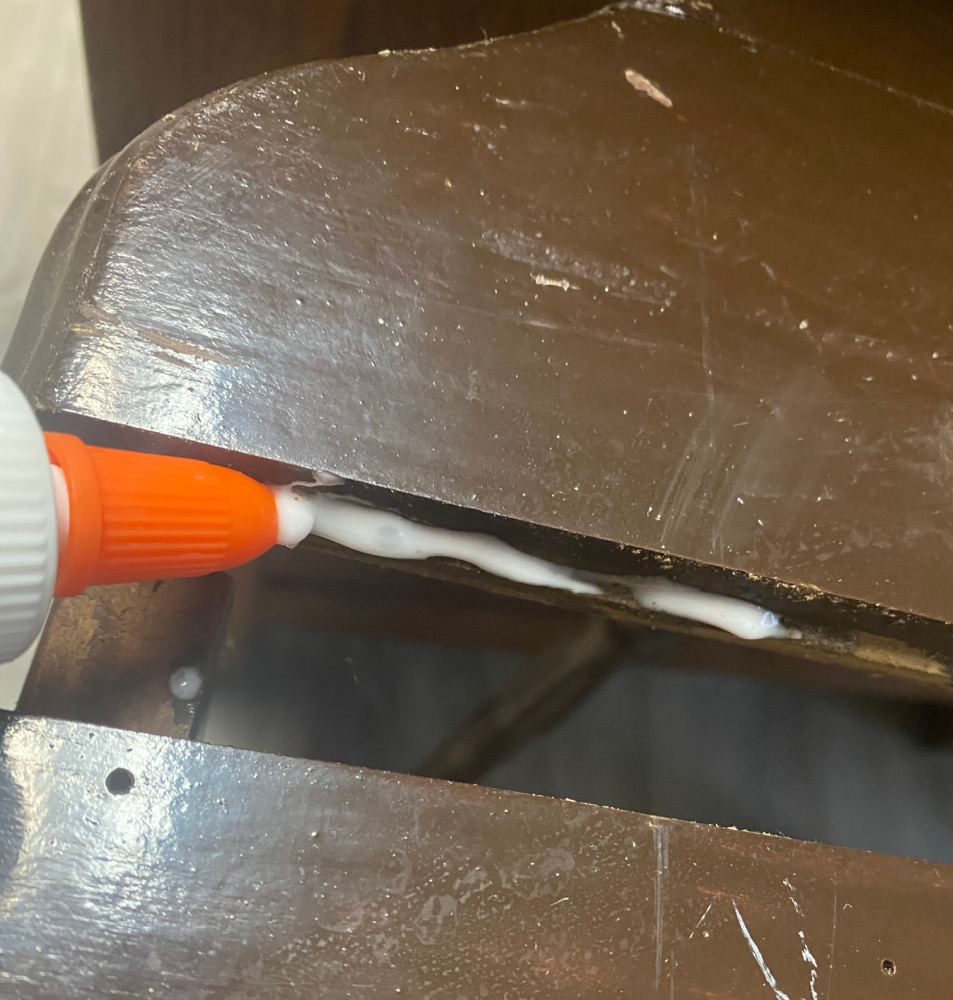
Push the top together and clamp into place.
I used 2 clamps. Because I only had 2 big enough. If I had 3, I would have used all three.
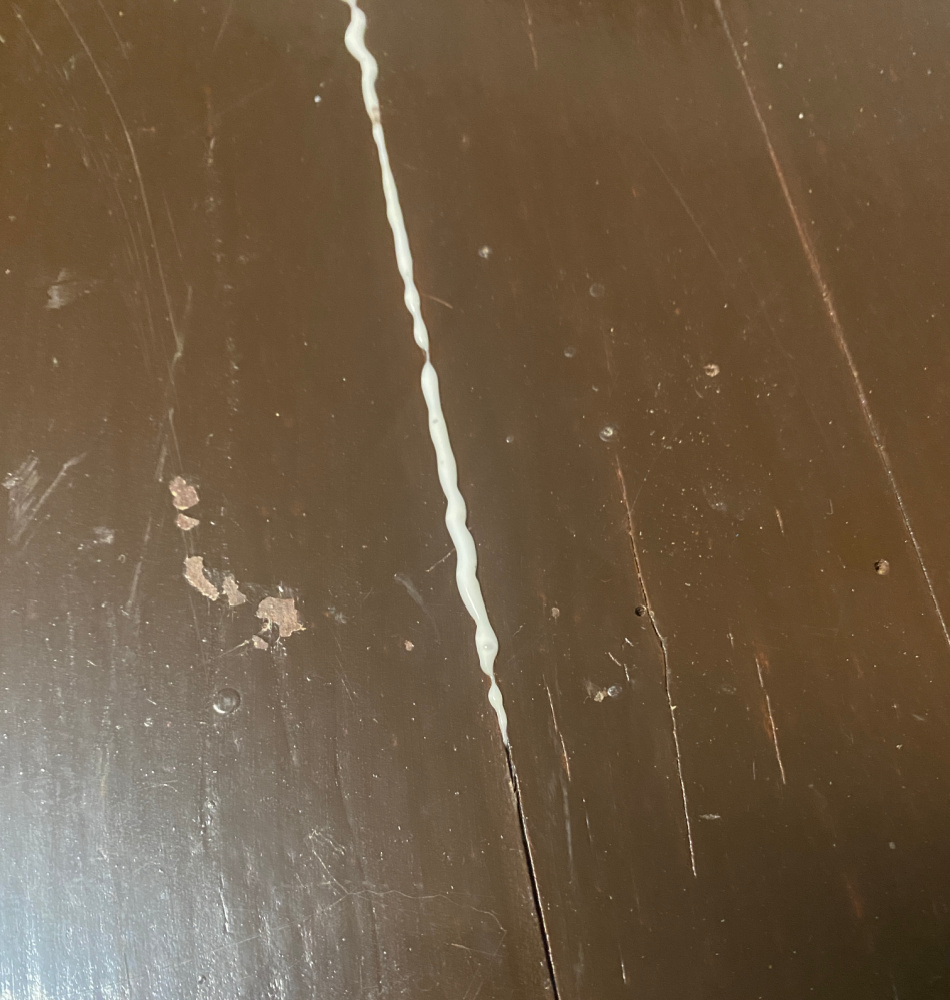
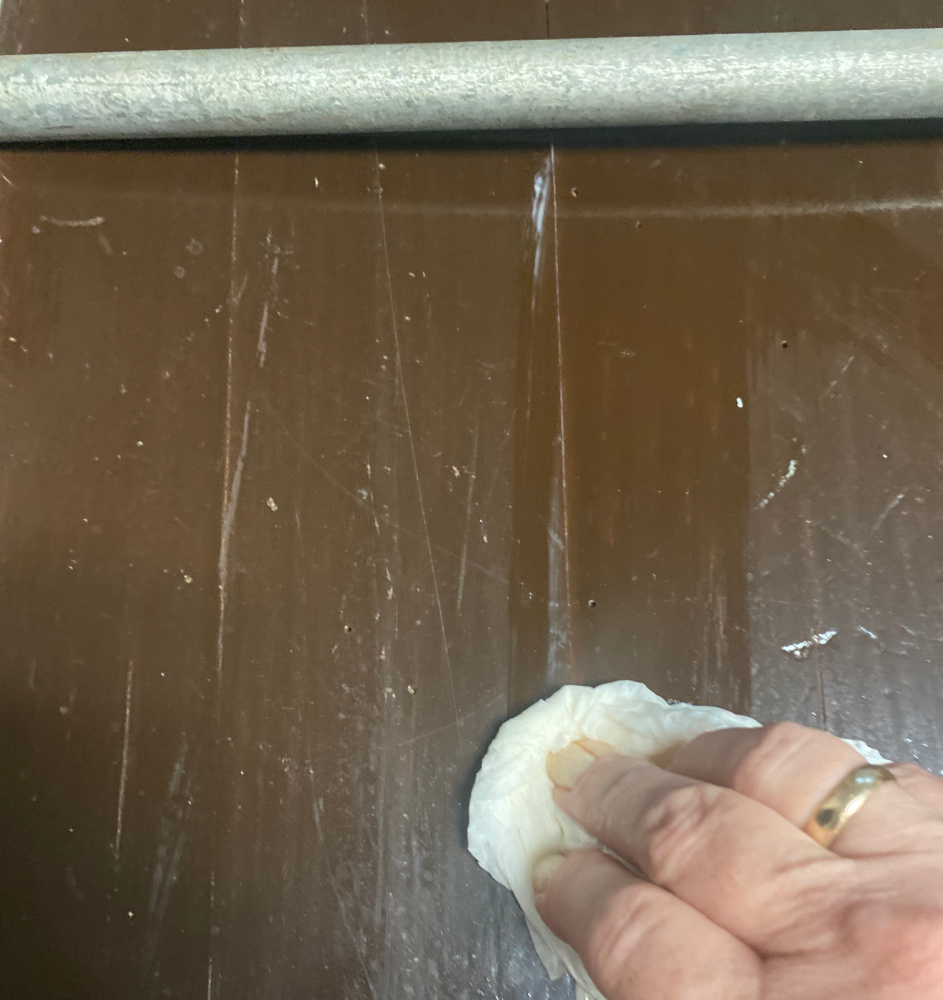
I allowed this to set for about 30 minutes and then wiped the joint with a damp rag removing the excess glue.
I allowed the repair to dry overnight.
Before you remove the clamp, you can reinforce the damaged area from beneath with a few screws and a mending plate. This will strengthen the repair and reduce the chance of the split recurring. Smart step, but I did not do this because I don’t plan to use the table for anything heavy. It would still have been a good move but you know me…anxious to get to the paint! I offer you one of my mom’s favorite quips…do as I say, not as I do!
You could even leave the clamps in place to give the entire piece a bath followed by a gentle sanding. I removed the clamps and gave the table a good wipe down with TSP.
Trisodium phosphate helps prep the surface to remove residual dirt, oils, and debris and preps the surface to better receive paint. Read about my be pre-paint prep tips HERE.
Choosing a Paint Color…or NOT
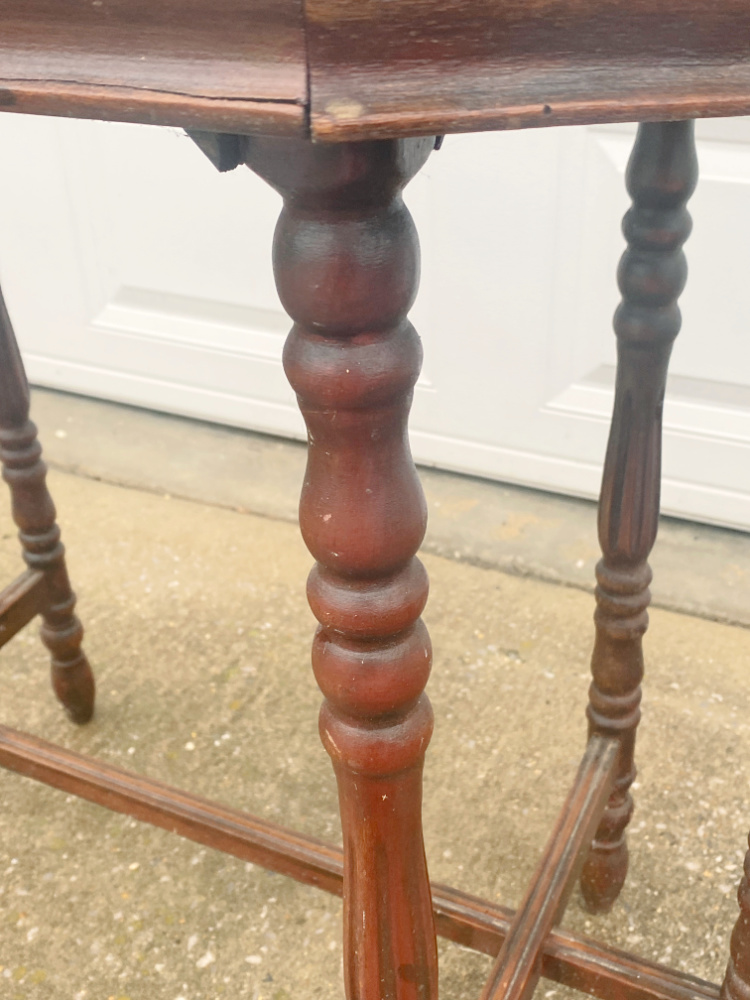
Next step was to sand the table top. I decided that the legs were is great shape with no major mars, knicks or dings.
So I would dry brush over the legs. That was the plan. So no sanding needed there so I decided to go to the more substantial project of sanding the tabletop. The top had what appeared to be a relatively thick coat of either oil based paint or paint with a heavy sealer.
When you work on older furniture pieces, you never know:
- what type of paint is on the piece
- how many paint layers there are
- what type of wood is beneath the paint
- what is the quality or condition of the wood beneath the paint.
It really is a grab bag of surprises. So my #1 rule for reviving old pieces is NEVER EVER BE HARD AND FAST TO YOUR GAMEPLAN. It is critical for your sanity to be fluid and ready to switch lanes during the project. That said, I grabbed the sander to “gently sand the tabletop” so I could get an idea of how well the paint might adhere.
And…that’s where the plan changed.
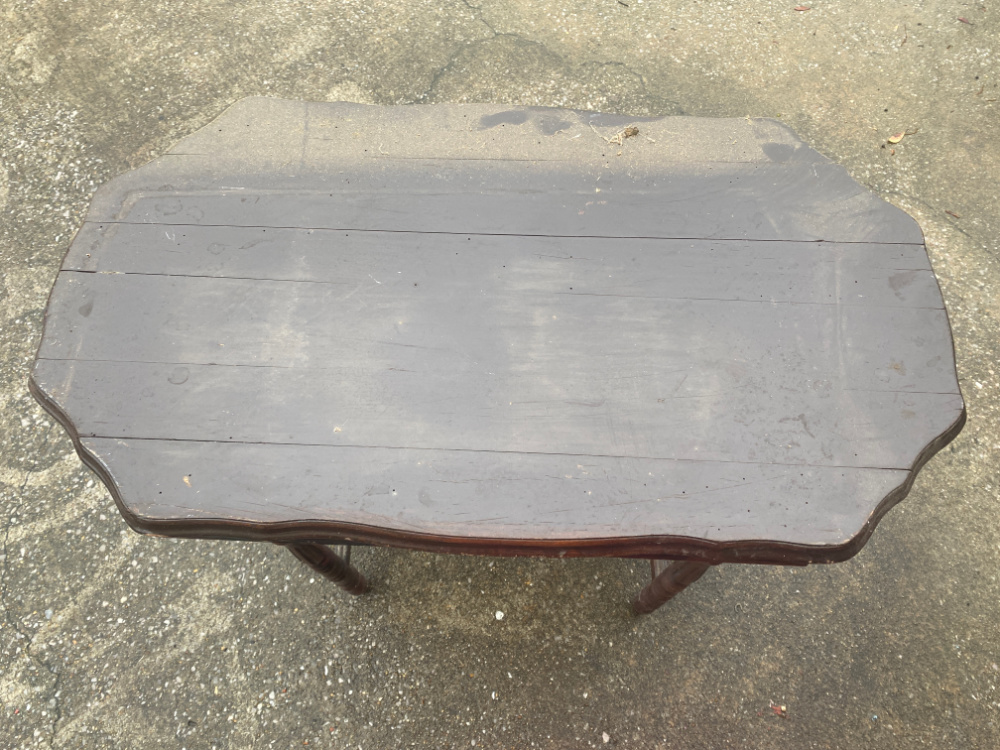
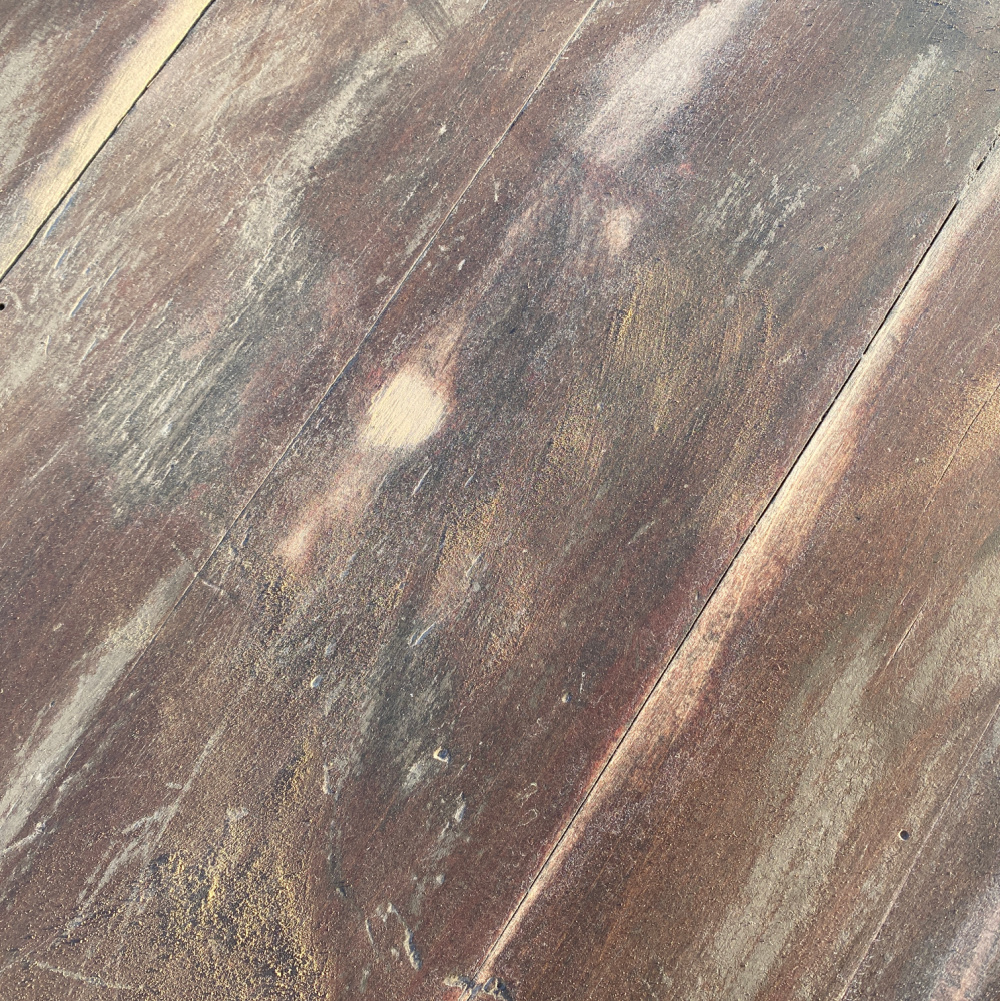
UNEXPECTED PATINA
That phrase…UNEXPECTED PATINA…gets me everytime. Once see beautiful old wood or gorgeous unique patina, I stop in my tracks and the plan changes. EVERY.STINKIN.TIME.
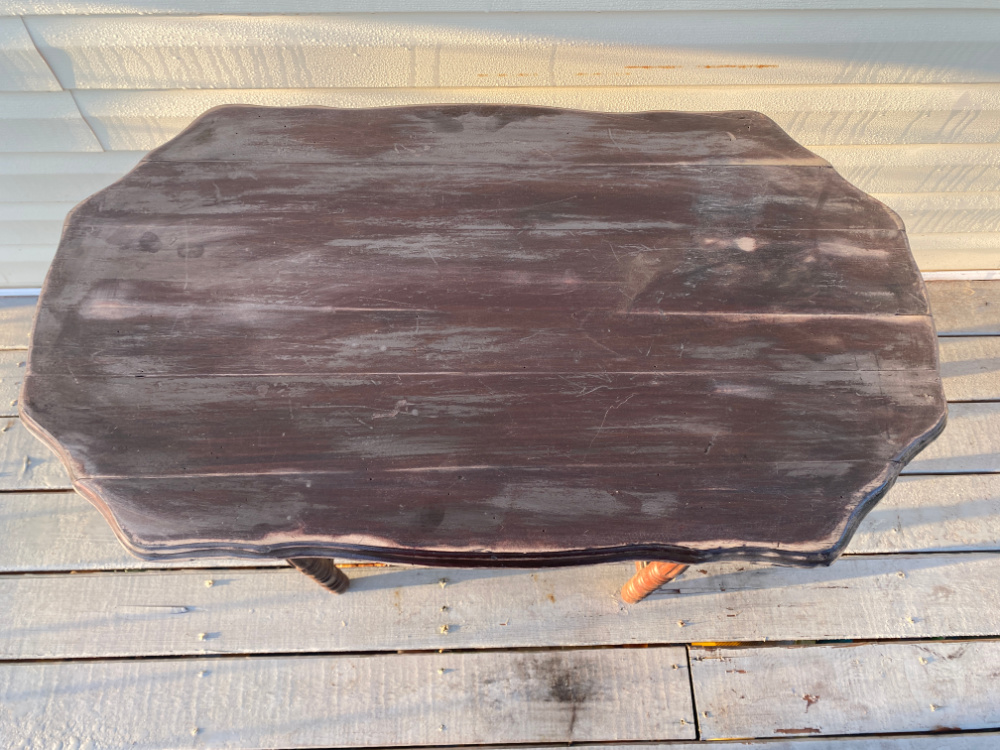
To most people, that photo above, is a mess. Their first thought is…grab a brush and paint over that mess! Not me…my mind says…oooh…let’s make that better…more fabulous and more unique.
Change in Plans…Imagine that!
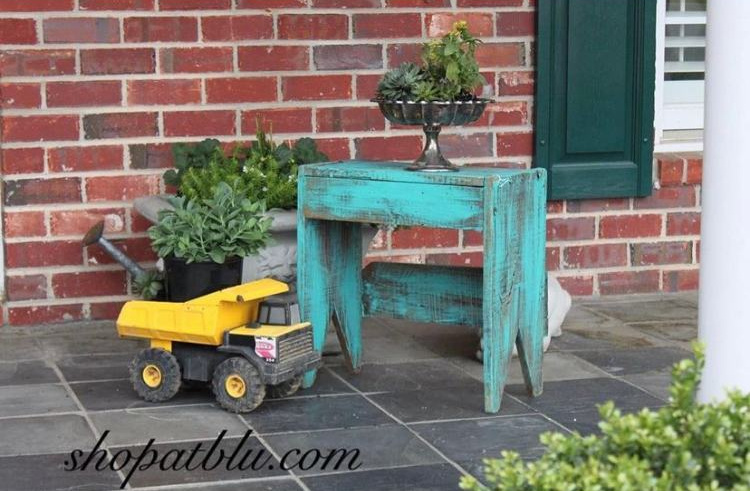
So at this point, I put away my favorite teal paint, General Finishes Milk Paint Patina Green. I was looking forward to using it as it had been a while. I used it on this stool pictures below. It’s a great color to use for transforming treasures as it really makes an impact.
So, this patina spoke to me and I had to see, or create, more.
She really was quite nice this way but, alas, I needed to see some wood beneath the patina.
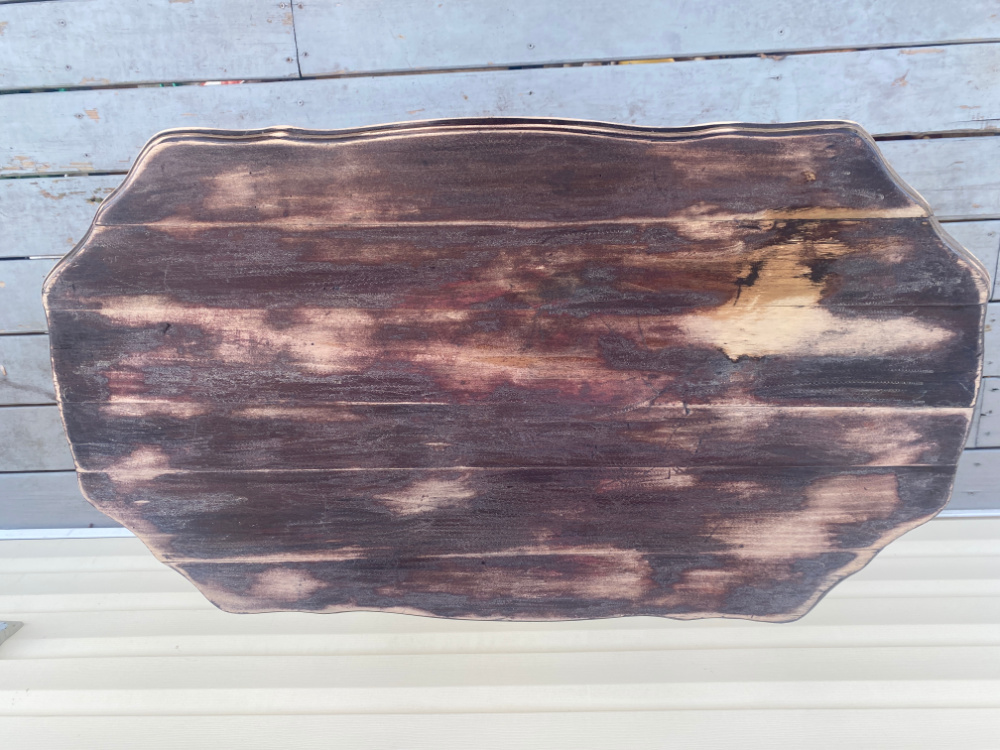
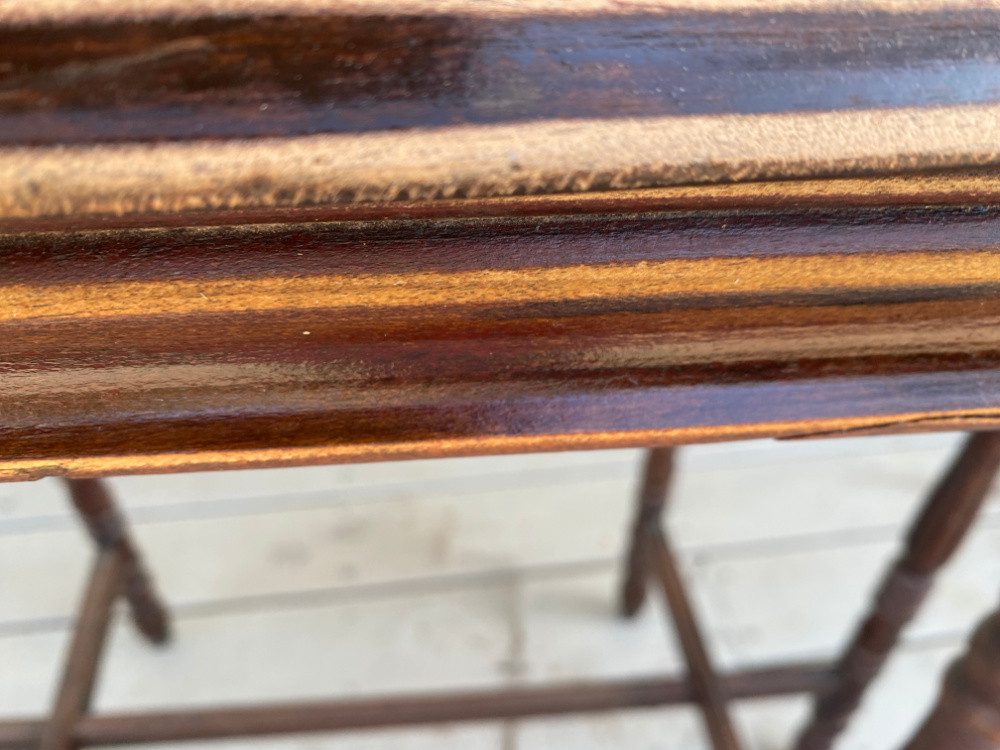
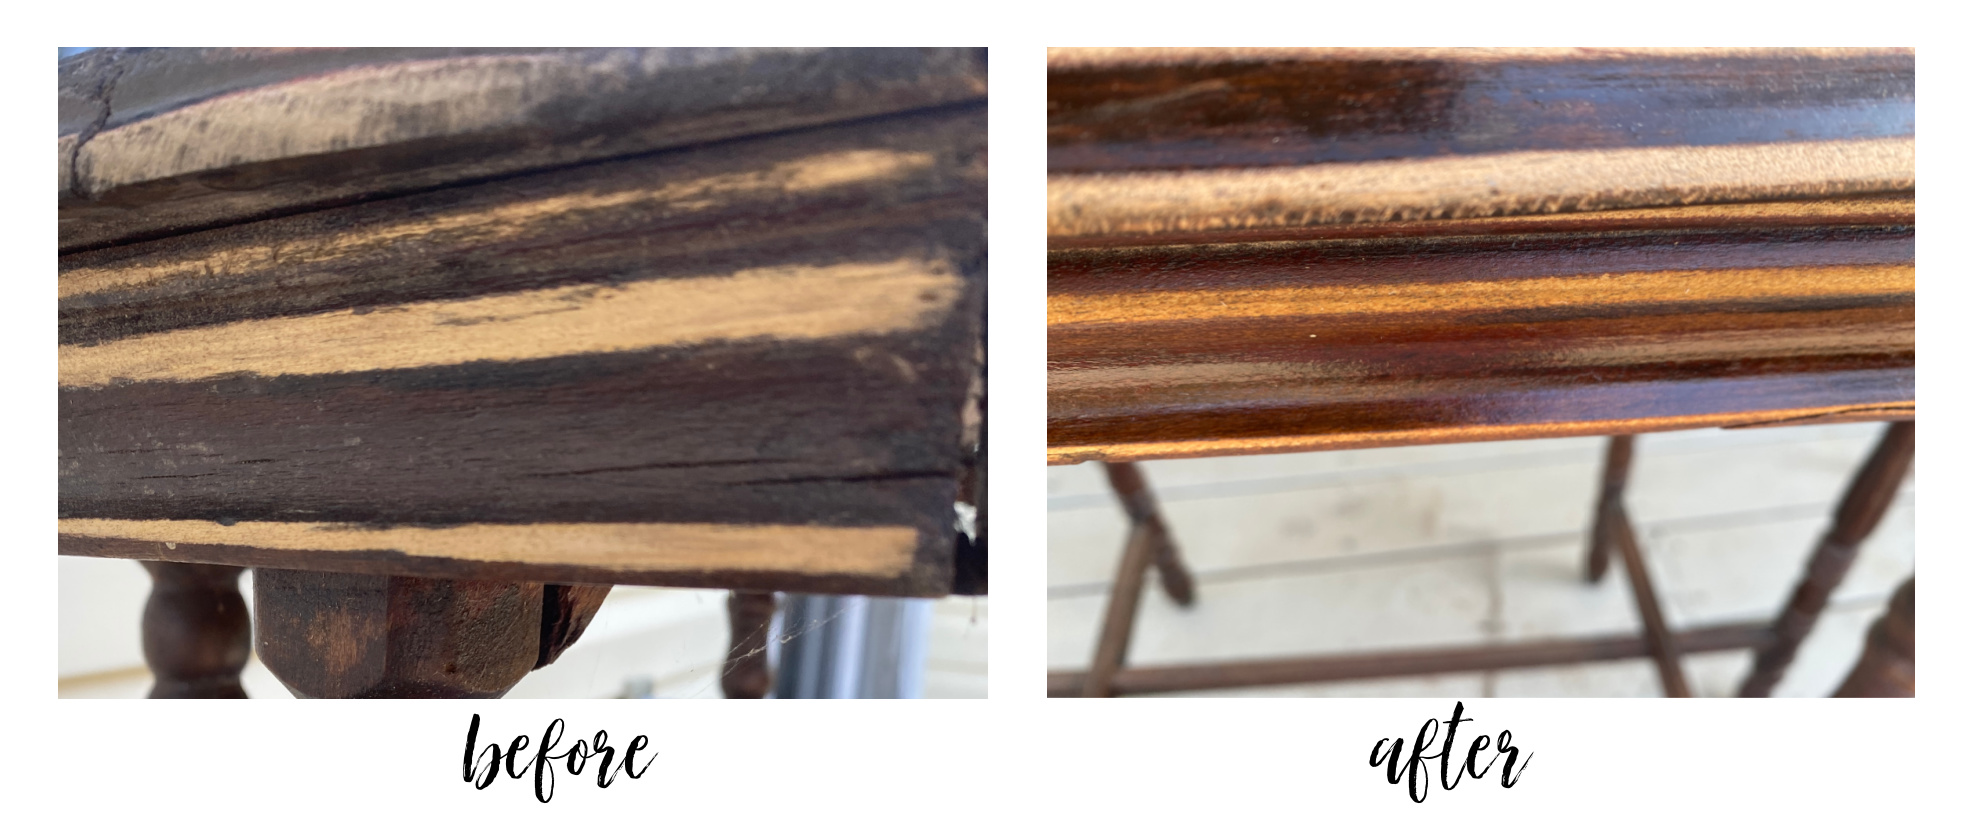
So, I sanded the edges and all of the curves around the table top.

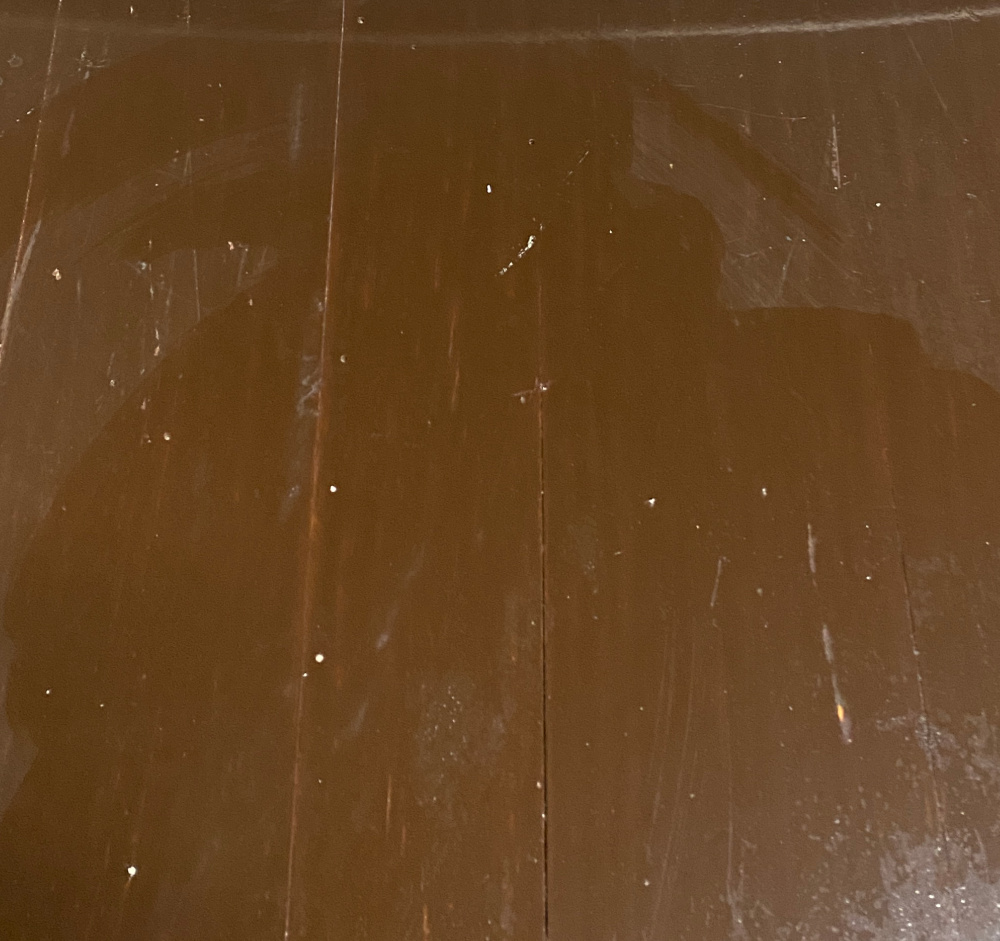
I could start to see some wood. The individual wood planks used to create this tabletop were becoming more defined.
But I knew there was MORE!
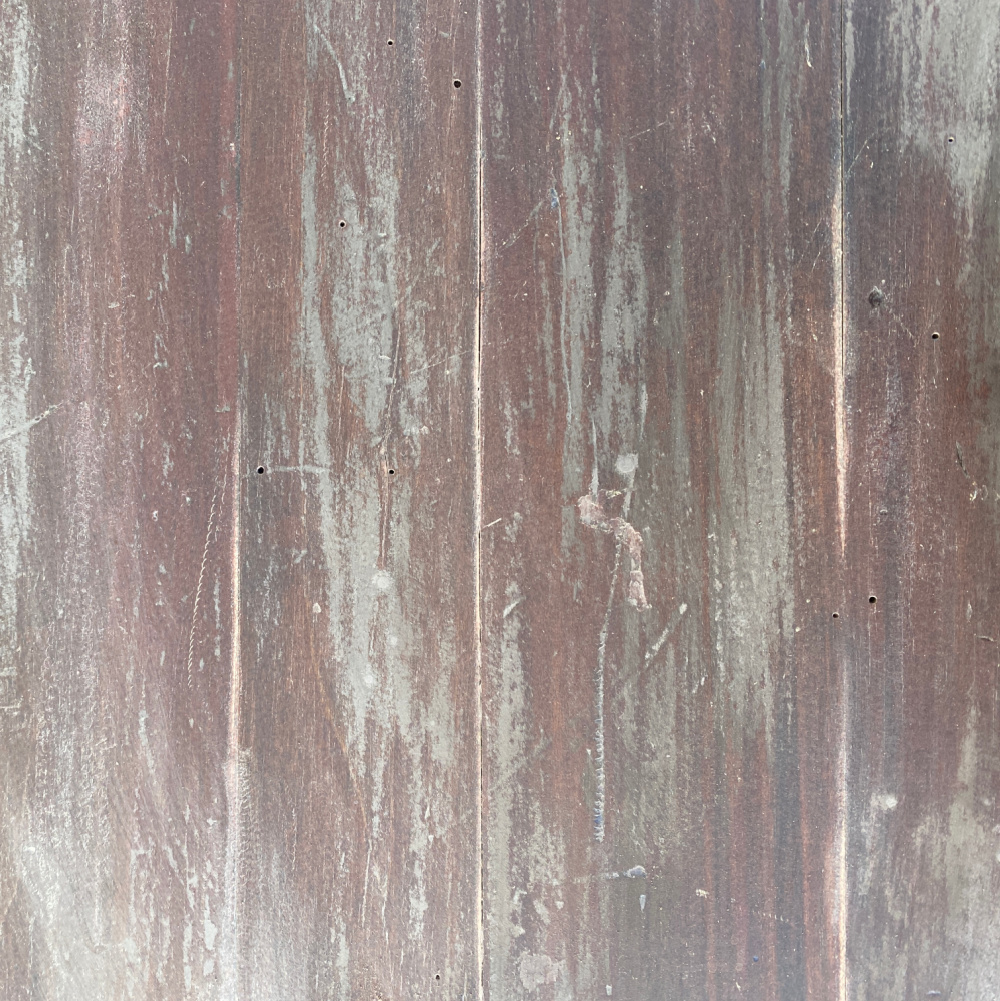
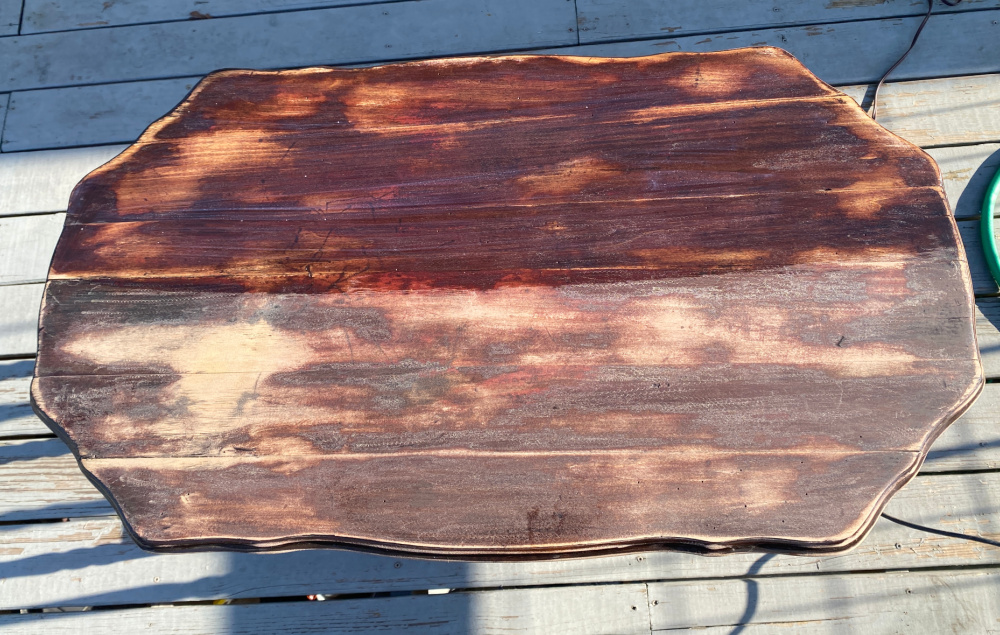
As second sanding revealed more of the joints of the boards and more texture from layers began to appear.
I wiped the top down to remove the dust so I could see the surface a little better.
The purpose of the last sanding was to even out the surface and try to unify the piece. Don’t worry though. The top will not be so visible and choppy when it is sealed. You will also be viewing the finished piece from an angle and not a direct over view…which is a little busy and unrefined, I will admit.
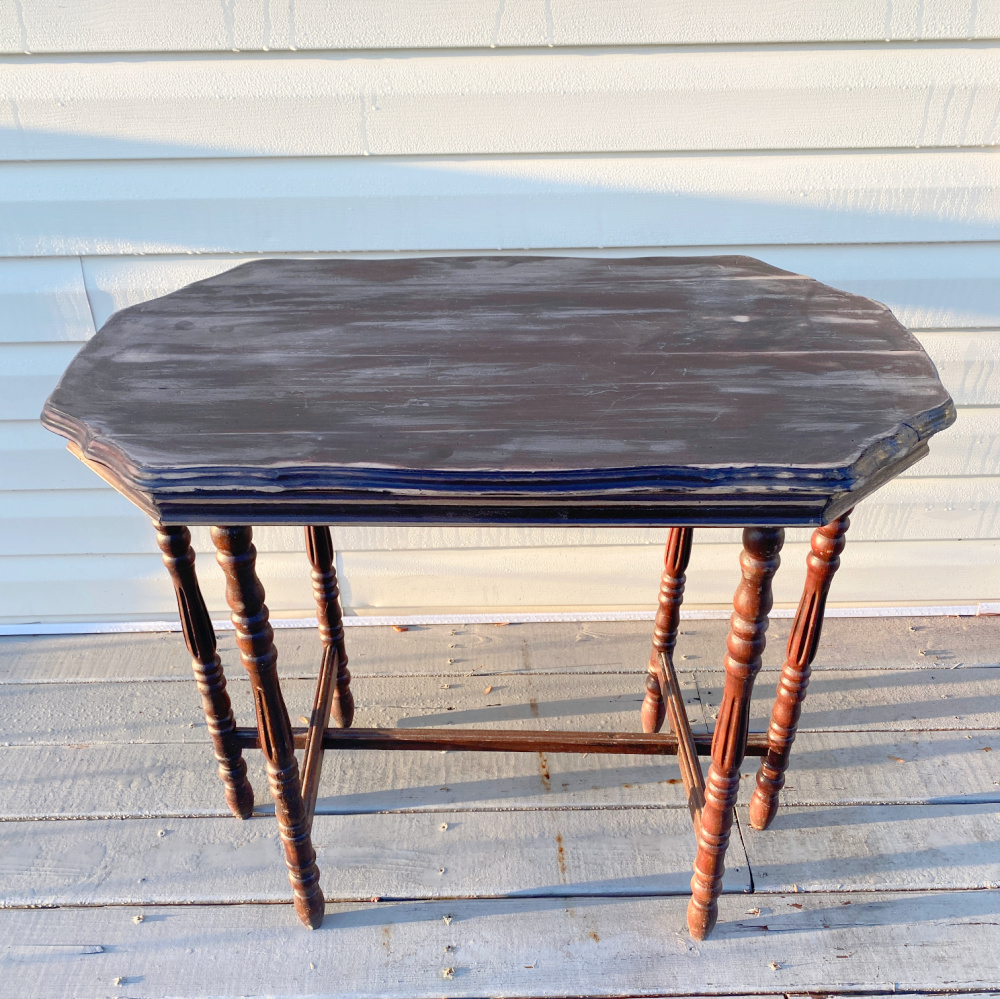
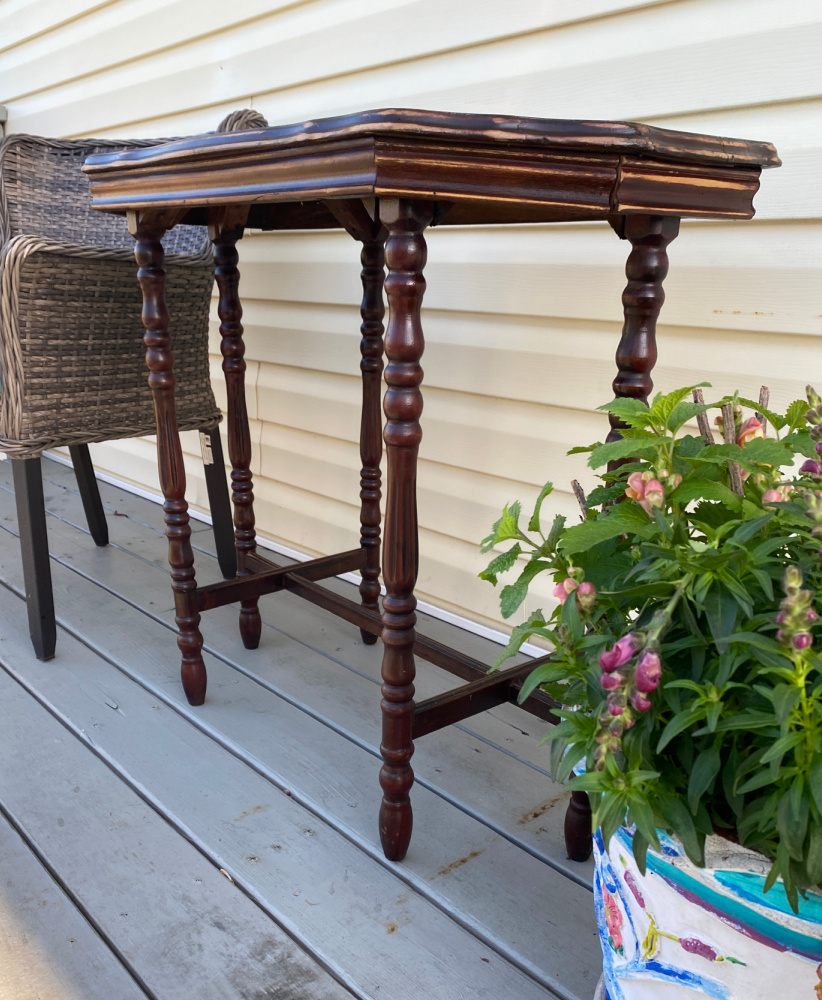
I used Polycrylic sealer on the top because it is a resilient and easy to use sealer. I do like the rustic look that is emerging.
Because those legs were in such great shape and so pretty, I decided to give them a coat of hemp oil to bring out the beauty in the wood. Hemp oil is applied with a rag and then buffed to a shine.
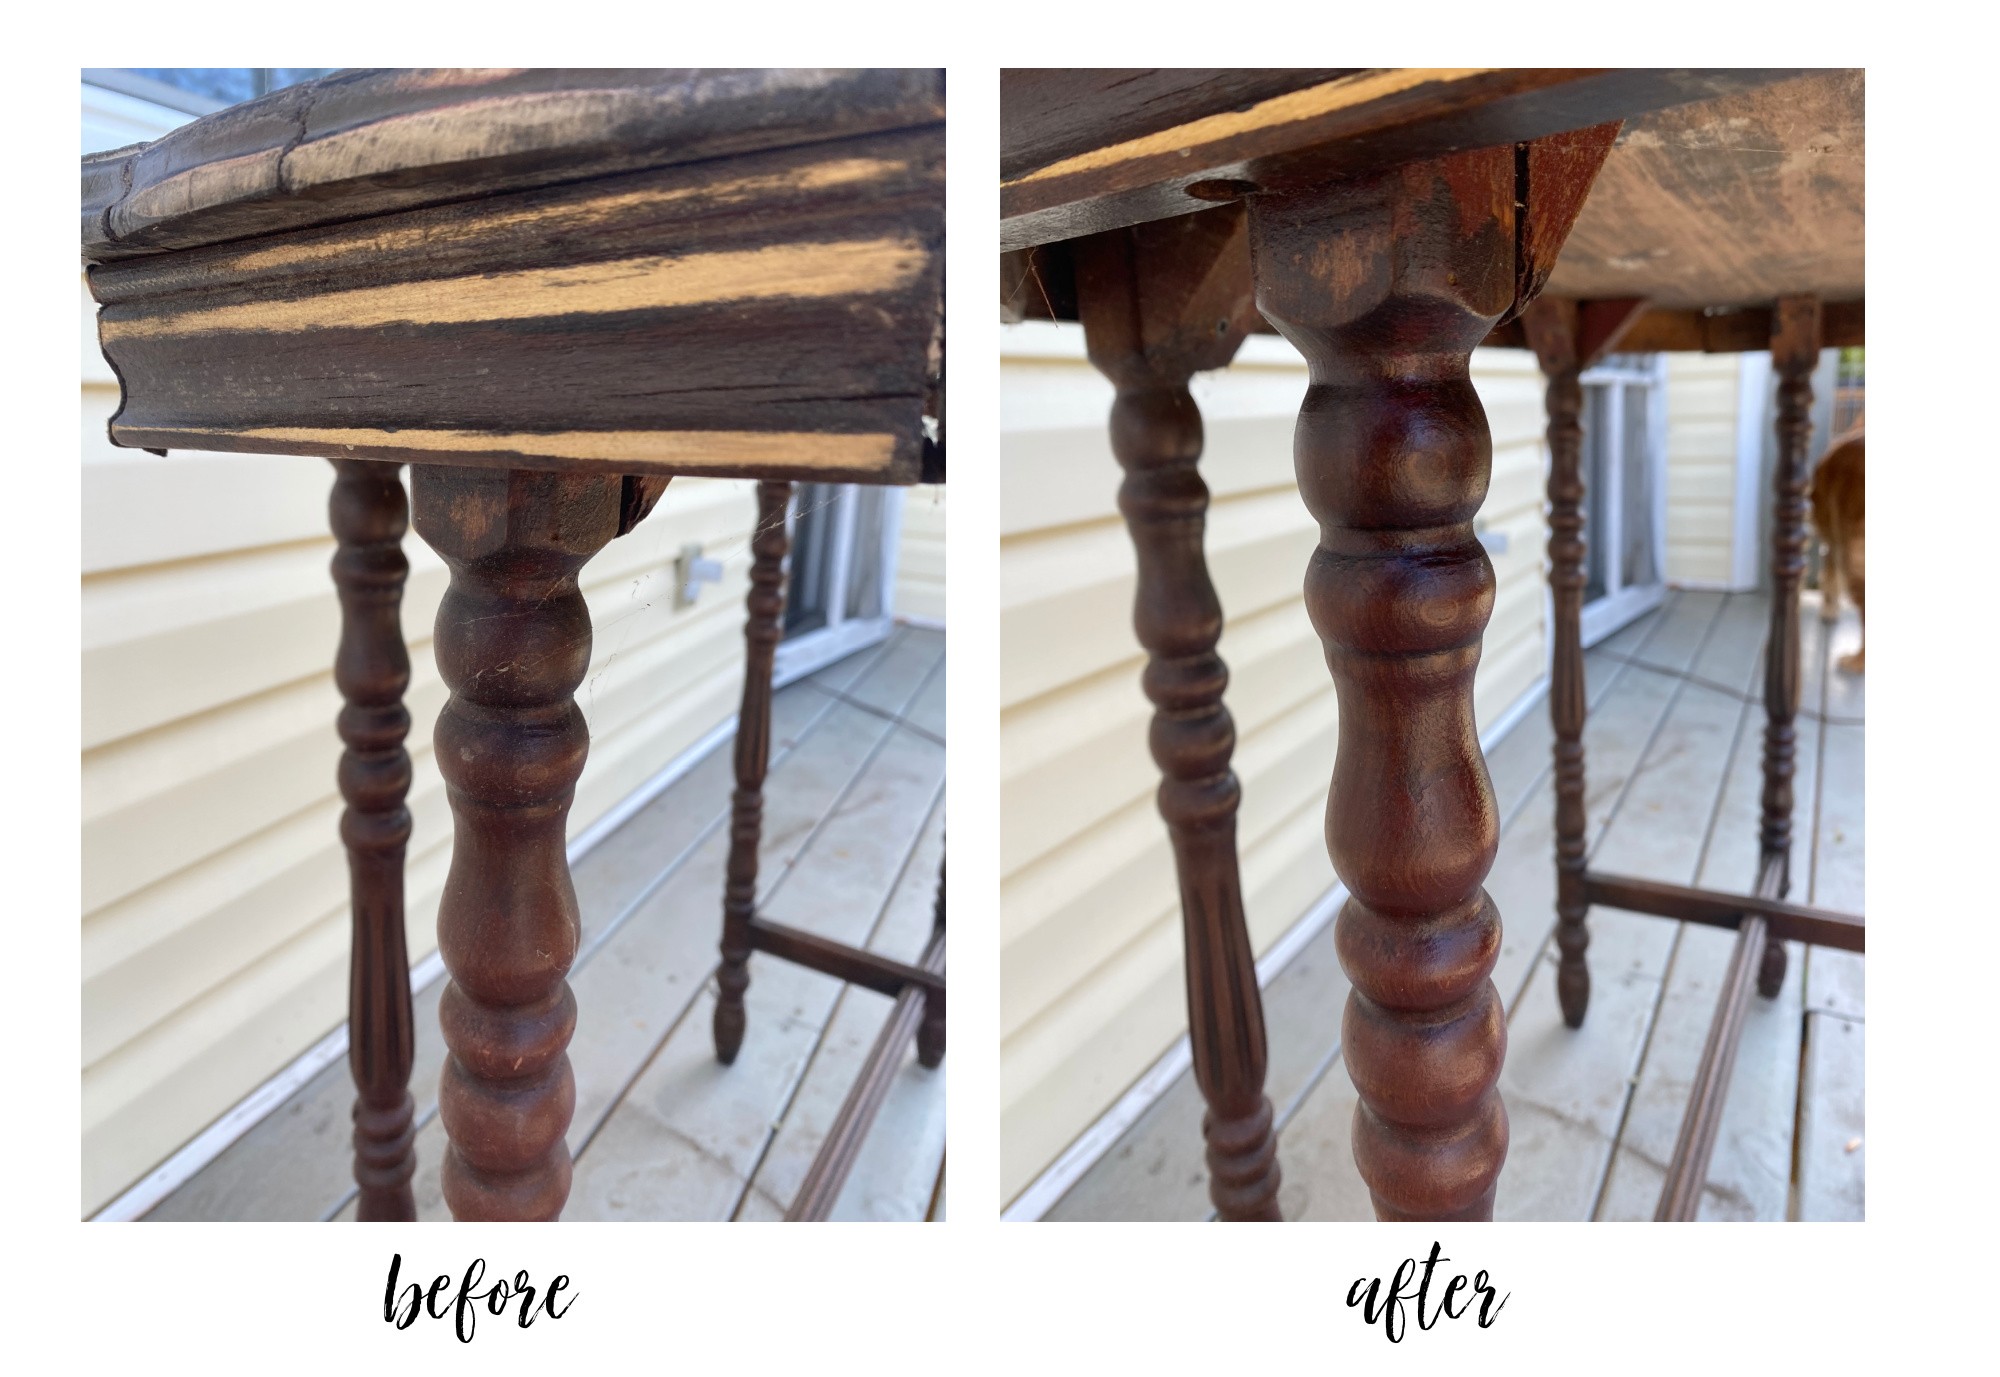
Look at how the hemp oil feeds the raw wood and makes the stain shine.
Hemp oil really feeds the wood and brings out those natural tannins.
And so, while my intended fabulous transformation of this antique radio table is not so spectacular a transformation, it is a revival of the wood and that makes my heart pretty darn happy. Who knows…maybe I will tire of the rustic shabby primitive worn look. Or maybe I will finally paint her and gift her to someone. But for now, I love her!
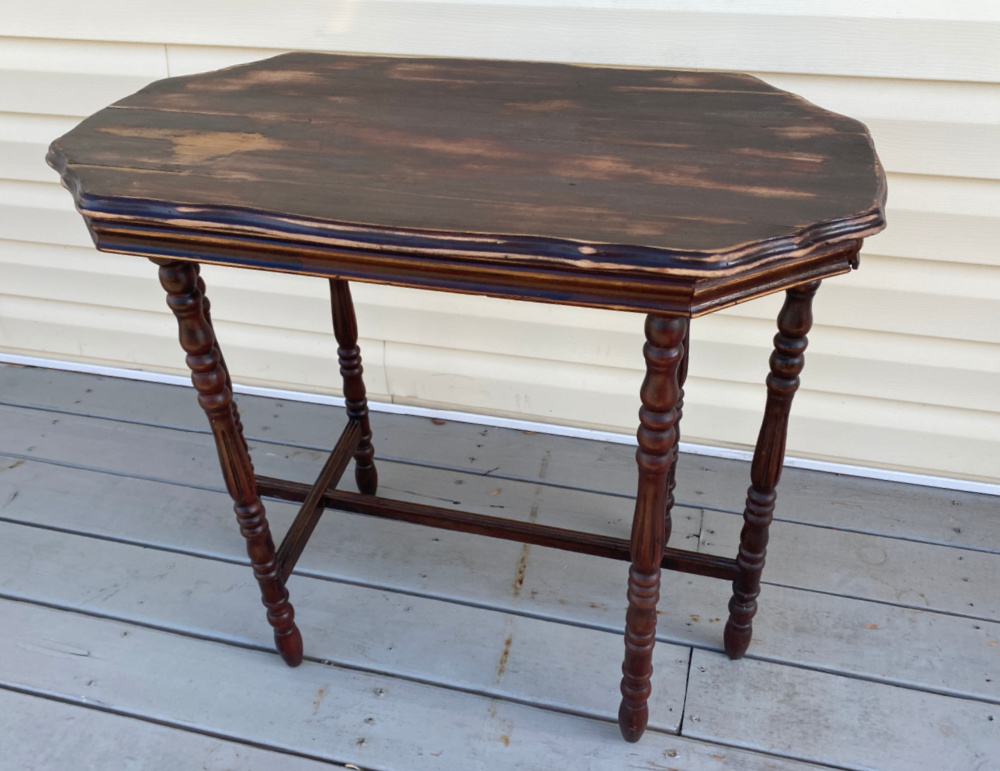
Can you picture her in the corner of the parlor holding the big ol’ radio with the family gathered around to catch the daily state of the nation or an update on the World War?
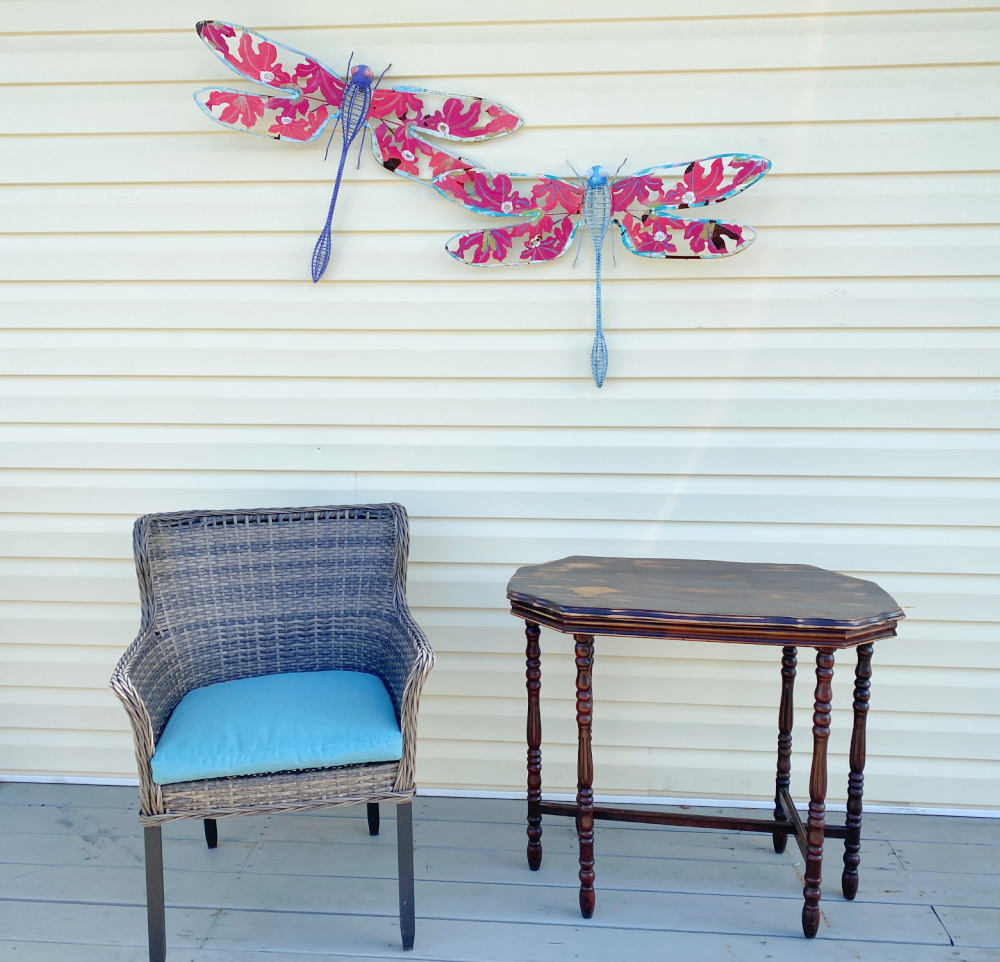
I think I have the perfect place for her in the house but for now, we will enjoy her for a while out here on the deck.
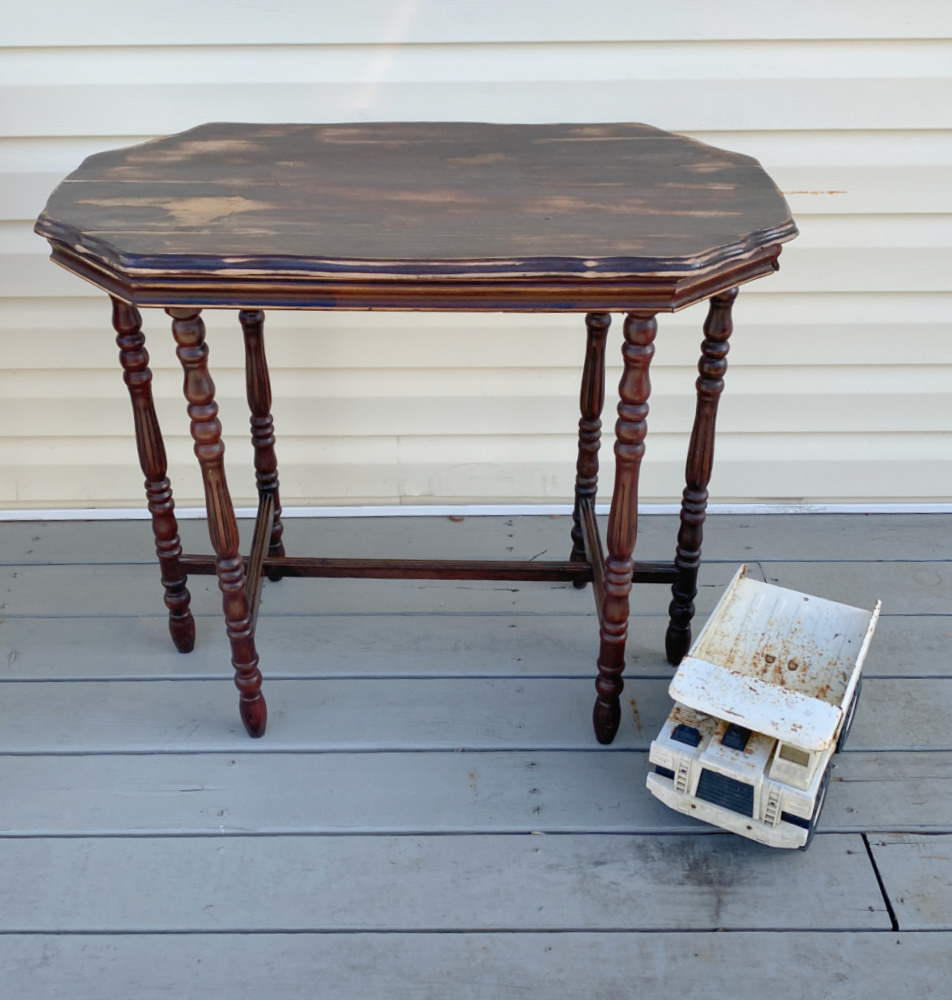
I have some other projects scheduled for out here, including restaining the deck and revamping this little white dump truck.
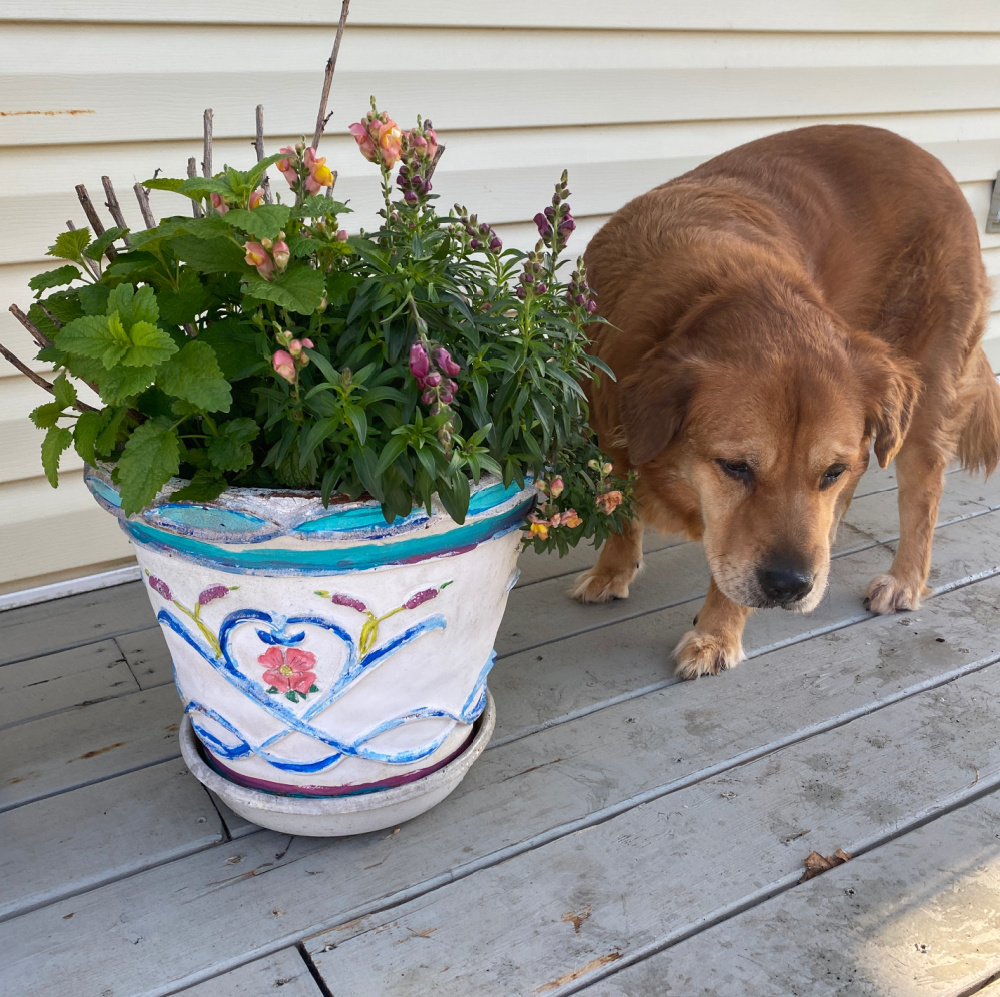
It was 85 degrees the other day and some of my perennials are starting to show off. Mia is excited for spring.
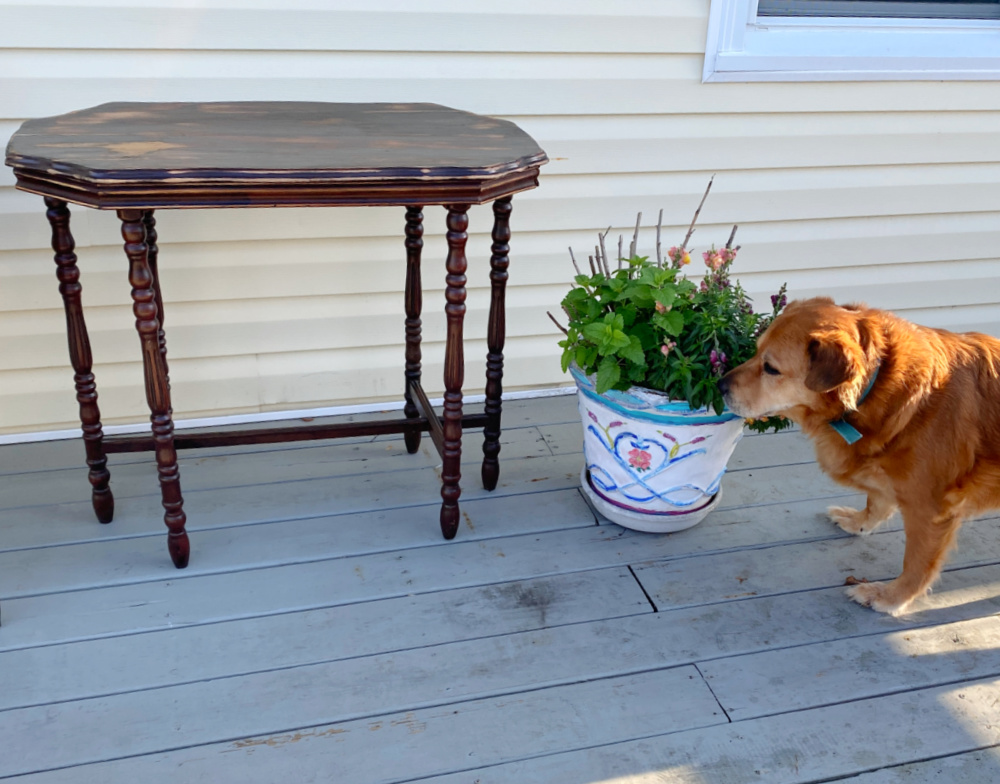
So are these snap dragons.
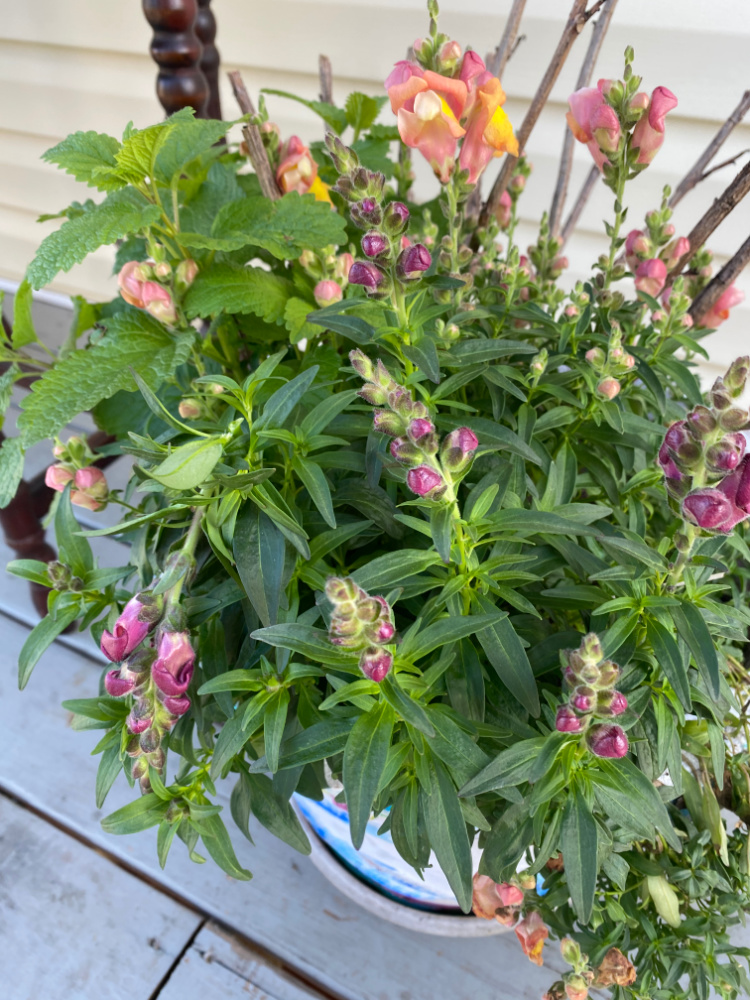

These planters were upcycled almost 3 years ago and the colors are still vibrant!
And here is a good before and after. Special thanks to the sisters who can’t be in the same room together but do love a good project with Mom.
Today is my youngers daughter, IV’s birthday. She is 26. I posted on IG and FB that there aren’t many people who know themselves better than my IV. I’m realizing that maybe she gets a little bit of that from me! I really wanted to paint this table with Patina Green. I really did. But one look at what was beneath 50 some years of paint and I was finished. It had to be natural. There was no fighting it.

So Happy Birthday IV…and you are welcome for this stubborn resistant yet unique streak that you are owning!

And here are the Thrift Store Decor Team’s projects for this month! Enjoy!!!
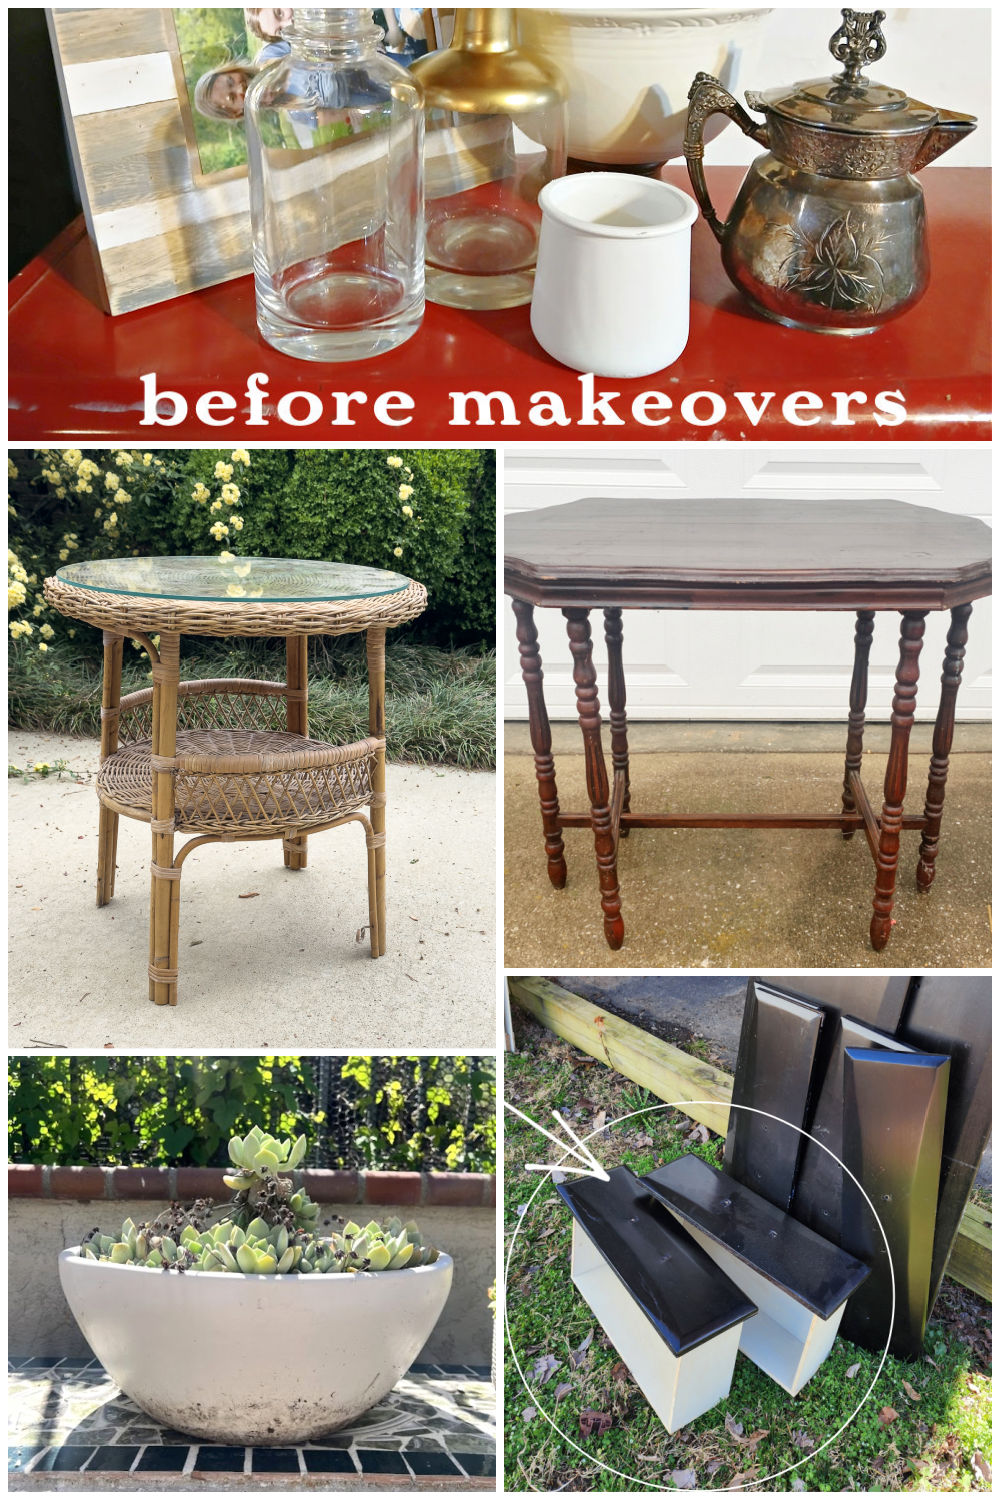
Petticoat Junktion-Rick Rack Home Decor
Our Southern Home-Spray Paint Wicker Table
Shop At Blu-Upcycled Thrift Store Antique Radio Table
My Uncommon Slice of Suburbia- High-End Garden Planter Knockoff
My Repurposed Life-Upcycled Drawers | Wall Shelf
First, Happy Birthday IV. You look like your beautiful mamma!
I paint anything that stands still long enough, but I think you made the right choice here Suzanne. As I was reading, I was thinking “I hope she doesn’t paint it”. My tip for seeing what furniture will look like after sealing is wiping it down with a wet cloth. It’s sort of a sneak peek. 🙂
I’m not sure it would have worked on this table, but when my clamps are not long enough for a headboard bench, I connect two together. 😉
Pinned!
gail
It was those legs that stopped me. If they were dinged and knicked, I probably would have painted them. But they were beautiful. I never thought of connecting two clamps!!! That’s why you are our resident builder! And thanks for the compliment!
Sue, your table is beautiful. I love the final finish. So sorry the table split while you were carrying it. I hate it when things like that happen 🙁 A big happy birthday to your IV!
Thanks, Kristin. I started to panic because I didn’t leave much time for this project but it all worked out!